Create an Agent
In the Agents tab, select one of the Agent Templates or click New Agent to start from scratch.
Tips:
You will notice that each agent reads and writes from/to different tables. These fields are editable once you start editing the template.
You may also create new agents in Digital Workforce, which will automatically show up in this dashboard. See this support article.
You cannot create a call directly from an agent template, you must first duplicate and edit one of these templates.

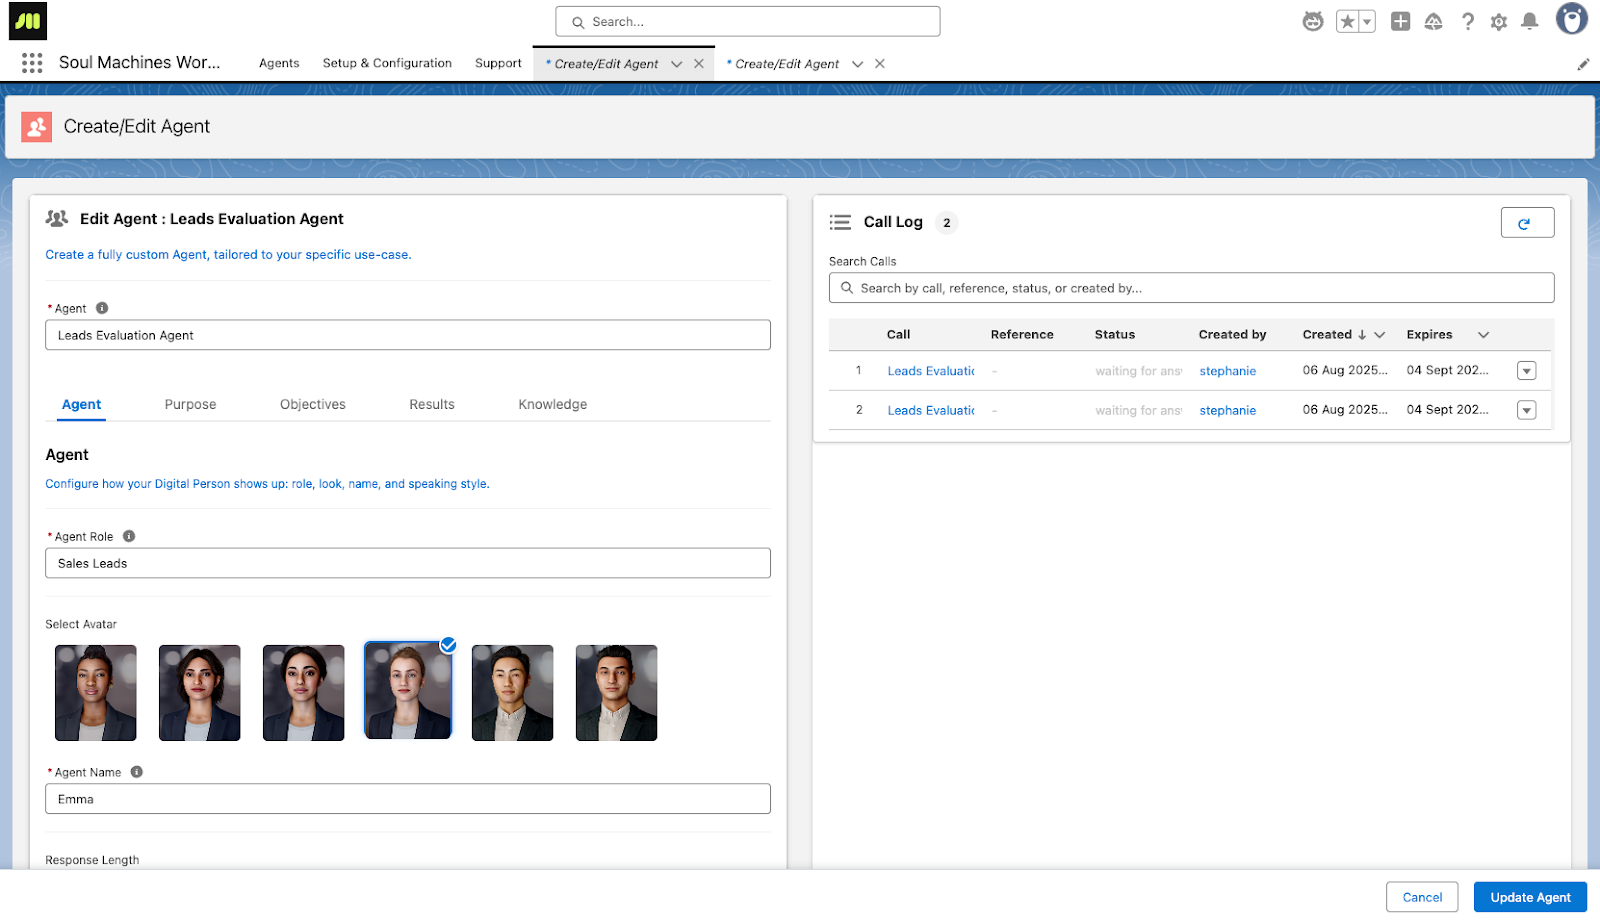
Customize your Agent
- Specify a name for your Agent, choose an avatar, and set the purpose, data sources, objectives, and results to tailor the call to your needs, then click Save to store your customized Agent in the list.
- Tips:
- If you have selected to create an agent from a pre-built template, all fields will be populated. Make sure to review them before deploying your agent
- If you choose to save results data to Salesforce object fields, it will overwrite any existing data in those selected fields.

Use Agentforce to deploy your Soul Machines Agents
Ready to activate? Open Agentforce and type a plain-language command, for example: ‘Create Soul Machines Calls with "Support Case" Agent for all Contacts in "Web Support - New"’.
Agentforce checks the list, shows you a summary, then asks for your confirmation. Once you confirm, Agentforce generates call URLs for every contact in that view. You may copy and paste these URLs from the Agent Call Log screen.

Access conversation data in the Call log
Completed call results begin populating the Call log table in real time.
If you have configured the results to be saved to Salesforce records, those records will also be updated as soon as results are received.
Was this article helpful?
That’s Great!
Thank you for your feedback
Sorry! We couldn't be helpful
Thank you for your feedback
Feedback sent
We appreciate your effort and will try to fix the article